
Introduction
So now that you have created your 1,000 automated test cases, now what? Running a 1,000 test cases on one machine, is going to take a day or two. One of the great benefits of Microsoft Test Mamangement System (MTM) is that you can create a lab environment to run your tests on.
Prerequisites
I am assuming that you have a TFS server up and running, and are using MTM for running and tracking test cases.
Overview of TFS Lab Environment Set Up
Microsoft Test Manager (MTM) communicates to the Team Foundation Server (TFS), to get test cases, automation builds, and a list of Test Controllers. When running automated tests, MTM sends the tests to TFS. The Test Controller is on a timer to check the TFS Server for tests needed to be run, it then picks up these tests and waits for each of the test agents to check in, once each of the test agents check in, it delivers a portion of the tests to the test agent, then each test agent reports back the results of the tests it ran, including any files relating to the testing. After the test controller has collected the results of all the tests, it then delivers them to the TFS Server, where the results can be viewed using MTM.

Step 1 Install Test Controller
You are going to want to install a Test Controller on one of your lab machines. Note that the Test Controller can exist on the same machine as a Test Agent.
You download the controller and agent installs here:
When installing the controller you will need a domain user that has access to the TFS server, and has admin rights of the machine that the controller is installed on.
1a. Login as the Domain User that you have created to run the controller. (must be admin)
1b. Download the controller, you may need something to convert ISO to a physical file, so you can launch the setup.
1c. Install the Test Controller
1d. Configure Test Controller should launch after install.
1e. Use specific domain account to login to TFS and other Test Agents. Put in the user credentials of the domain user created in step 1a.
1e. Check "Register with Team Project Collection" and click on Browser add your TFS server location, and select your project.
1f. Click Apply Settings.

Step 2 Install Test Agents
For each lab machine, install the Test Agent on the machine. You will want to add the new domain user to each machine, login as that user on each machine, and install and configure the agent on each machine. To save time, you can copy the files that you expanded from the ISO image in step 1 to each machine, then run the set up from each machine.
1a. Login as the Domain User that you created. (must be admin rights)
1b. Download the Test Agent, copy files from machine in step 1.
1c. Install the Test Agent
1d. Configure Test Agent should launch after install.
1e. Use specific domain account you used to login to machine as.
1e. Check "Register with Test Controller" and put the name of the machine that is on the same domain, that contains the Test Controller
1f. Click Apply Settings.
Step 3 Add New Physical Environment
3a. Open Microsoft Test Management
3b. Navigate to Lab Center -Lab - Environments, Click on New, then Physical Environment.

3c. Fill out the name and description of the new environment, and set the location of the new controller you just added in step 1.

3d. Next select Machines (on the left menu), This page is set up into two planes, on the right is the available machines from the selected controller, and on the left is the machines added to the environment. Select each of the machines that you want to add to the environment. (that will be used for your automation), Set them all to type of Desktop Client. Then click finish.
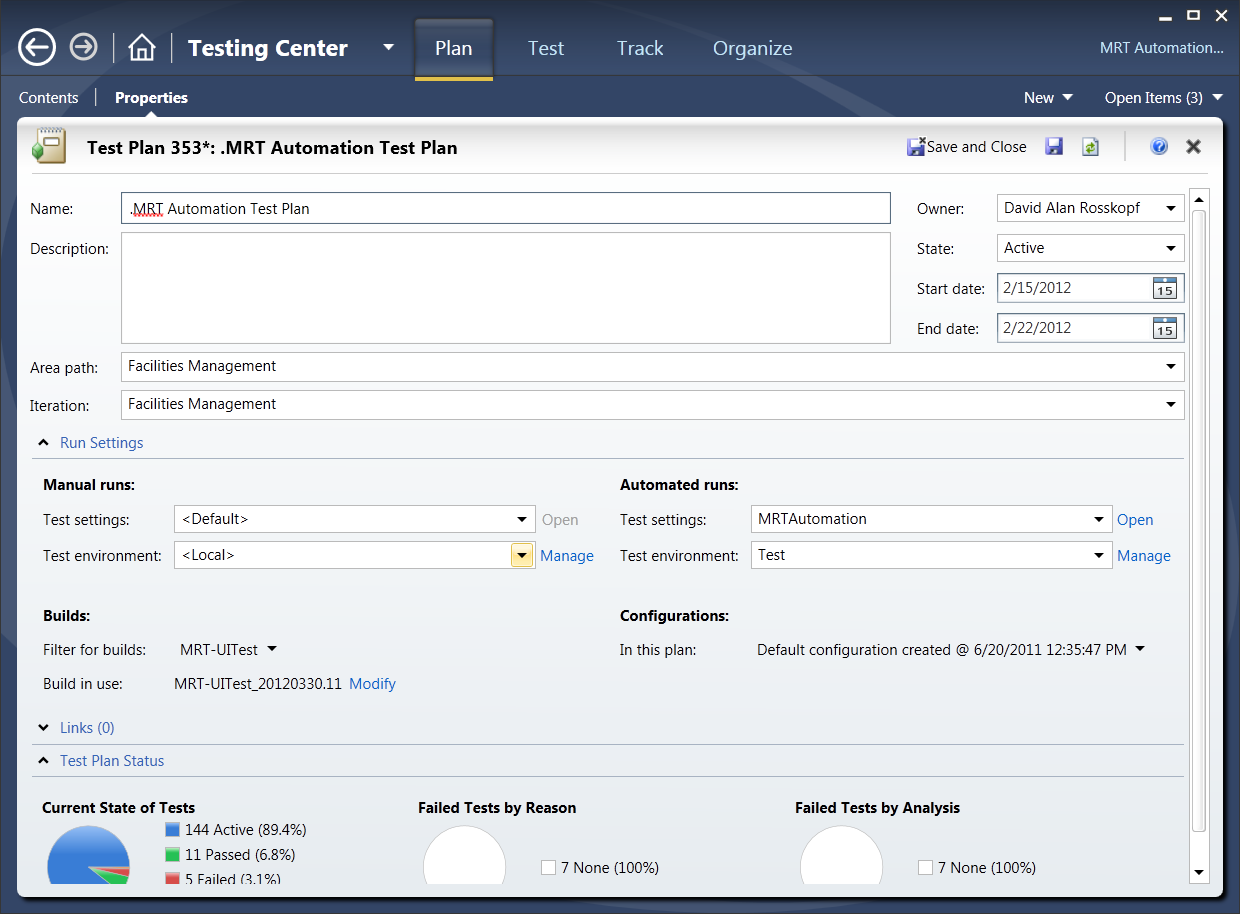
Step 4 Associate Environment to Test Plan
4a. Navigate to the Testing Center - Plan - Properties, set the Test Environment to the environment you just created. Now any automated test ran in this test suite will run on the Test lab you just created.
No comments:
Post a Comment